IGEL First Time Setup
Over the past several months, I've been looking at IGEL as a Thin Client solution in some niche spots. There are plenty of guides and communities online, but most assumed you already understood the IGEL ecosystem (I didn't) or had prior experience setting up thin-client environments (I didn't). To further the complexity, I decided to step in right when many IGEL administrators were in the midst of a massive move from Version 11 to Version 12 of their OS, so much of the content I found was no longer applicable.
I'm going to skip over what IGEL is and why you'd use it. I'm assuming if you're planning on testing it out that you've already figured out it's something you at least want to test. Instead, we're going to jump straight into installing the Operating System on a test device. For this demo I'll be using Hyper-V, but tweaking the steps to run on physical hardware or another hypervisor should be relatively simple.
The last thing I'll mention before jumping in is that this demo is going to set up a stand-alone IGEL system. This isn't how you're going to use it in production. Instead you'd set up the IGEL Unified Management Suite (UMS) which can centrally control all of your IGEL systems. This isn't necessary to demo the OS.
If you're from a Windows background: think of IGEL OS as the replacement for Windows on the endpoint, and UMS as the replacement for Active Directory or your MDM solution.
Downloading IGEL
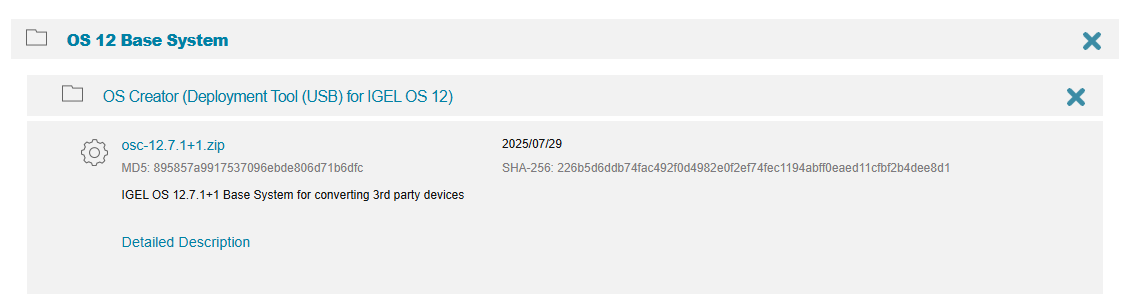
To download the IGEL Operating System, head on over to the Software Downloads page. If this link no longer works by the time you read this, just search for IGEL OS Downloads. As it's written today, you'll want to first select IGEL OS 12 SECURE ENDPOINT and then expand the OS 12 BASE SYSTEM section. You're looking for the OS Creator tool, and you'll want to pick the latest version they have listed.
You'll be prompted next to fill out a short contact form which includes your email address. Yes, someone will probably reach out to you in a few days. I found their sales team pretty low pressure. My first response to them was basically that I was just curious about it and I'd let them know if it was something I wanted to move forward with.
This seems like a small price to pay to be able to demo something from a vendor without first needing to have a lengthy discussion with a sales team and complete an NDA.
preparestick.exe and follow the steps provided (you do not need this for Hyper-V!).Installing IGEL on Hyper-V
For the purposes of this post, I'm going to assume you have configured a Hyper-V environment and you have access to the Hyper-V console. I'm also going to assume that you have a Virtual Switch created already. If not, you'll want to work that out first so that you can provide network access to the Hyper-V guest.
- Create a New Virtual Machine within the Hyper-V Console. Skip past the "Before you begin" page if presented.
- Give the system a name. Neither the name or the optional storage location are important, whatever works for you.
- Select a Generation 2 virtual machine. IGEL is a modern Operating System and will take advantage of Generation 2.
- Decide how much memory you want to set aside for IGEL. It can run on as little as 2 GB, but I recommend at least 4-8 GB.
- Pick a virtual switch that has Internet access.
- IGEL requires very little disk space. As the disk is dynamically sized, I stick with the default 127 GB (see note below).
- Select Install an Operating System from a bootable CD/DVD-ROM and browse out to the IGEL ISO file you unzipped.
- Click Finish on the final page.
- Right click on the created Virtual Machine and select Settings. In the Security section change the Template (under Secure Boot) to Microsoft UEFI Certificate Authority.
If you're planning to evaluate the IGEL Managed Hypervisor (IMH), ensure you give it enough space to build and run guest VMs within IGEL. Because the Managed Hypervisor isn’t included in the demo license, I'm not covering it here.
Now that your Hyper-V guest system is created, double click on it to launch it and then click the Start button.
Setting up the IGEL Operating System
The setup of IGEL will be similar to that of any Operating System you're going to install. It's GUI based, and most of the questions are easy to understand. Here is the first screen you'll see, which asks which language you'd like to use.
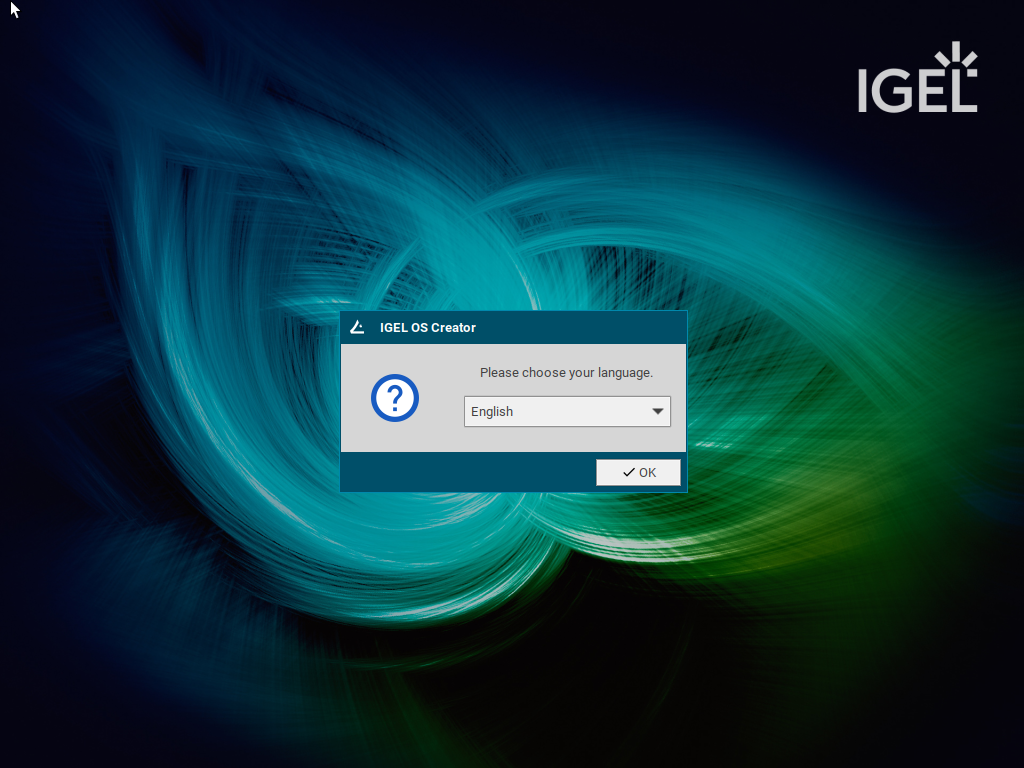
Select your language and click OK.
Next, you'll be reminded that the disk you're installing this on will be overwritten. If you're using a Virtual Machine, you have nothing to worry about here. If you're using a physical laptop/desktop, this is the point where you should make sure you have a copy of anything you need from that system, because it's about to be wiped.
You have very little options on this screen to adjust. You can leave them all at their defaults and click Install IGEL OS. After an EULA and one more reminder that you're about to wipe your disk, the installation will run.
The IGEL OS installation takes 3-5 minutes on Hyper-V and about the same on any relatively modern hardware. When it's done, click the Reboot button and follow the remaining prompts to eject the CD or USB key. This happens automatically on Hyper-V, you don't need to unmount the ISO.
IGEL First Boot
On your first boot, you'll go through something similar to the Windows OOBE (Out of Box Experience). You'll pick your Display & Keyboard languages, accept another license agreement (which hopefully doesn't mention I can't blog about this), and setup your timezone.
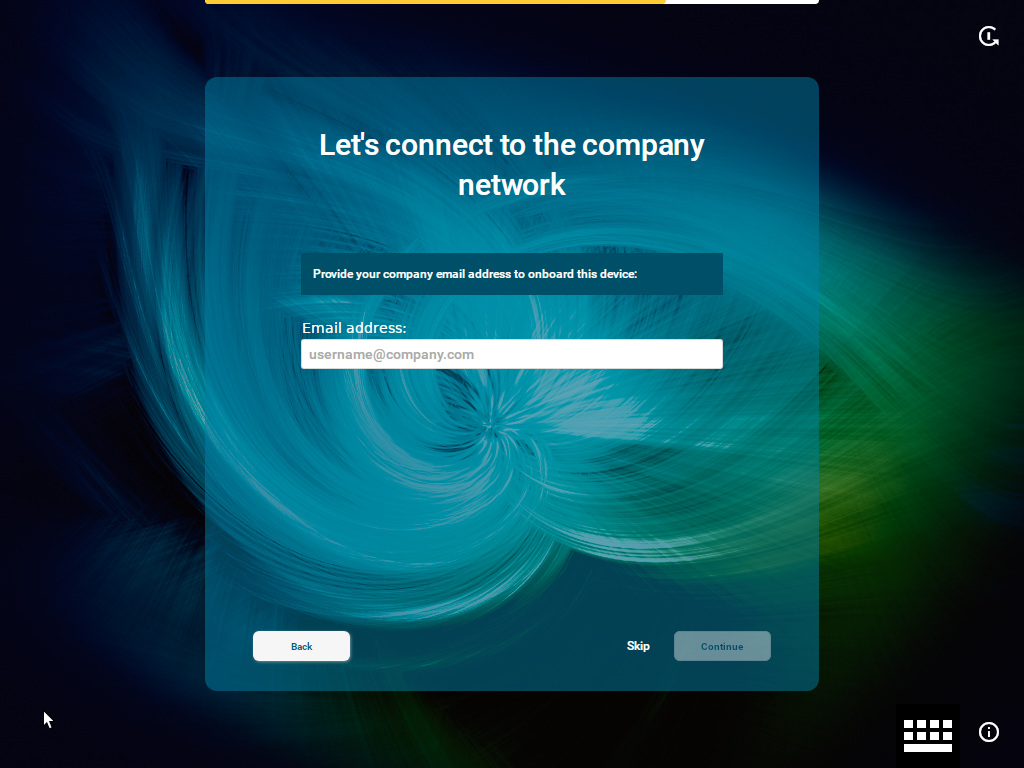
After the initial setup, IGEL will prompt you to connect to a company network using an email address. Since this is just a demo, you can skip this step.
Next you'll be prompted for your UMS address. Like your email address, you'll want to skip this since you're just demoing the Operating System at this time. You can ignore any messages about a TLS certificate for onboarding services (this will likely come up if your company is using SSL inspection technology, such as Zscaler).
Finally, you'll be able to register and get a 90 day demo license. You'll need this to use most parts of the IGEL OS, so don't skip this step. Click the Get Started link under the option that most applies to you (likely the one about implementing an IGEL solution for your company).
If instead of being offered a demo license you get the error Invalid TLS certificate for the Demo License page. Please contact your administrator., your network is probably using a Man-in-the-Middle (MITM) solution for SSL/TLS inspection, such as Zscaler. As a result, your security solution is intercepting and replacing the certificate before it reaches the OS. You can move the device to a public network to get past this, or you can install the Root CA for your MITM solution on the IGEL OS device. I may cover this in a future blog post. Until then, consider reaching out to IGEL for support.
Using your new IGEL system
Moving around the desktop and menus should be relatively intuitive. The most important thing at this stage to keep in mind is you're on a bare and unmanaged IGEL Operating System. This is not the experience your users will have. Instead, if you move forward with IGEL, their system would be pre-configured with the Azure, Amazon, Citrix, etc. sessions that you configured in the UMS we discussed above.
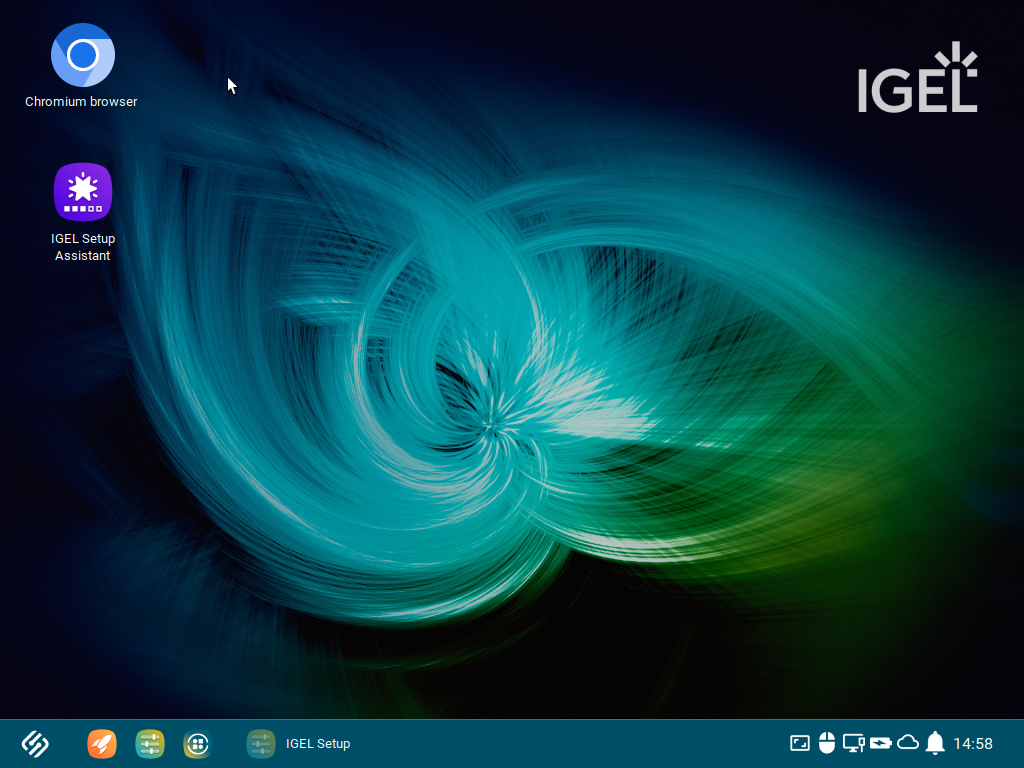
At the bottom of the screen you'll find four icons aligned to the left of the taskbar.

From left to right: Start Menu (familiar to Windows users, though IGEL may call it something else), the Application Launcher, Setup, and the Application Portal ("App Portal").
Let's start with the Application Portal and install a browser so we can get around a bit.
- Click on the Application Portal icon.
- In the search box, type Chromium.
- Click on the Chromium Browser application and choose Install.
- Click the Continue button.
- Accept the license agreement.
Close the App Portal and watch the download progress to know when the installation is complete. Click Restart Now when prompted.
Alright, so you've installed Chromium. Where is it?
In IGEL, installing an application isn't enough — you also need to create a "session" so that users can actually launch it. When you're managing your environment with a UMS, these usually go together, but you'll find situations where you may want to deploy an application but not actually expose it to the GUI for the user to interact with.
To create a "session" for the user (in this case, you) to interact with, open Setup (the icon to the left of the App Portal on the taskbar). Moving forward, you'll be in here a lot to configure the system. This is often hidden from the users in a production environment, but this exact same setup experience exists on the UMS, so it's OK to get accustomed to it here.
To expose Chromium so that it can be launched, follow these steps:
- Go to the Apps tab.
- Expand Chromium Browser and select Sessions.
- Click on the plus (+) icon on the right side of the page.
- Give the session a name. You can use the default one as well.
- Review the other settings. Play around and adjust them if you wish.
- Click Save
Minimize the IGEL Setup application to find that you now have a Chromium icon on your desktop.
Follow the same steps of installing an application and setting up a session to try out other things in your environment that you'd want to expose through a Thin Client solution like IGEL. Look through the various session settings to see how you can configure things like automatic login, or things like "Boot to Cloud" where your users don't even see the IGEL OS but instead the system boots directly to their Azure Virtual Desktop login window.
You should now have a solid starting point for exploring the IGEL environment. Happy demoing