Setup Google Cloud Certificate Authority - Part 1
In a recent series of blog posts, I walked through standing up a Certificate Authority within your Active Directory organization. As more systems moves to the cloud, you may be looking for a method to run your CA from the cloud. If you're interested in what a Certificate Authority is and how it works, I'd encourage you to read my first post in the series Standing up a Microsoft Certificate Authority.
Google currently offers cloud based Certificate Authority in their suite of services available to enterprises. In this post, I'm going to stand up a new Root CA in the Google Cloud Platform.
IMPORTANT: It should be noted that this service is currently a beta offering, so while interesting to look at, it's not something I'd likely use in an enterprise until it's fully released. Google has the following statement:
CAs and certificates created in Beta will be deleted once Certificate Authority Service becomes generally available.
Something I'd like to point out right up front is that you cannot use a Google Certificate Authority for auto-enrollment like you can with a Microsoft CA, and which we did in Part 6 of the Microsoft CA setup. You could use a Google Root CA and then use an internal Microsoft CA for your issuing authority, or you could setup a CA proxy service.
Logging in for the First Time
If you've never used the Google Cloud Platform, you'll first need to setup a Google account, if you don't have one already, and log in to the Google Cloud Platform Console. There are some initial steps you'll need to walk through, and you'll need to provide a credit card number, although Google promised not to charge it without your authority.
Creating the Root CA
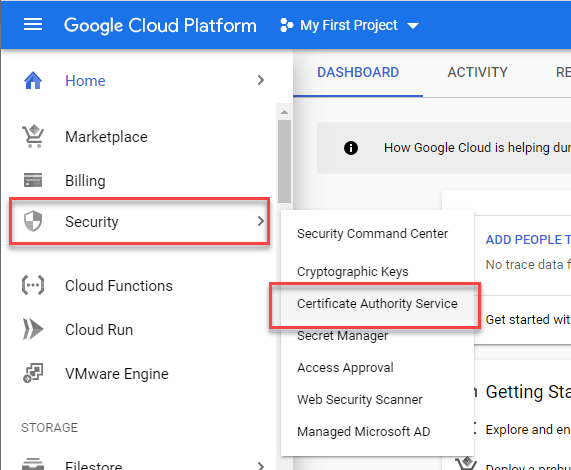
Once you've reached the dashboard, select the Security Menu and then Certificate Authority Service.
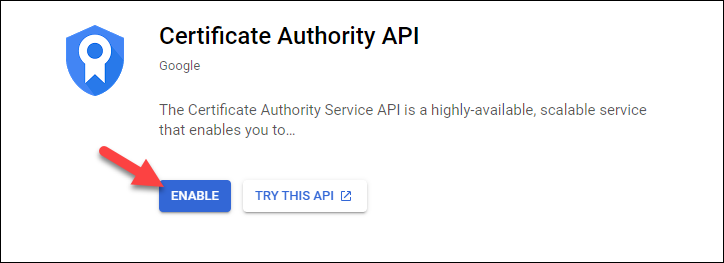
Next, you'll need to select to enable this API. This will take a few minutes to complete.
From the top of the page, you'll now select the Create CA button to start the six-step CA Setup Wizard.

I'll then complete the wizard using the following settings:
Step 1 - CA Type
In the first step, I'm going to leave the TYPE as a Root CA, and I'm going to to change the validity period to 20 years as I did in my Microsoft CA post. I'll set the Tier as Enterprise since I'm looking to setup an Enterprise CA, and I'm going to select us-east-1 as my region as that makes the most sense to me.
For the reusable configuration, I'm going to select Root Unconstrained. The configurations define which type of certificates can be issued by this CA. If there was an option, I'd select a configuration that allowed for no other certificates to be issued other than a subordinate CA, but that doesn't appear to be an option.
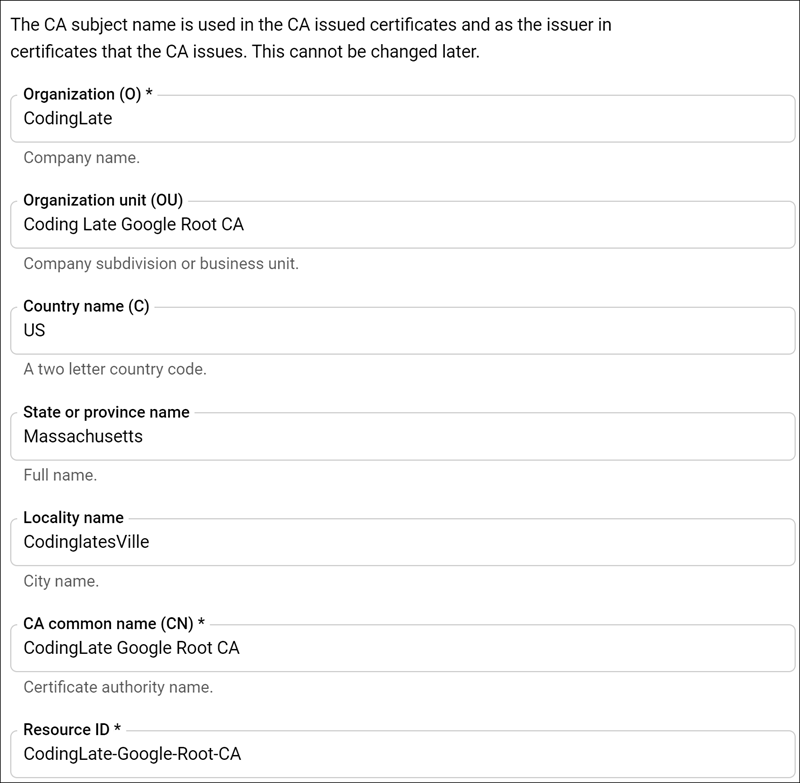
Step 2 - CA Subject Name
I'll configure my Root CA Subject information similar to as I did with the Microsoft CA. Below is the configuration I used:
Step 3 - CA Key Size
As I look through the options for key size, the most appropriate is the RSA PKCS1 4096 bit key. If you're setting up a lab (which is all you should be using this for as it's still in beta), this shouldn't matter to much to you. When you're ready to setup your production environment, you should research your options to ensure you select the best option for your organization.
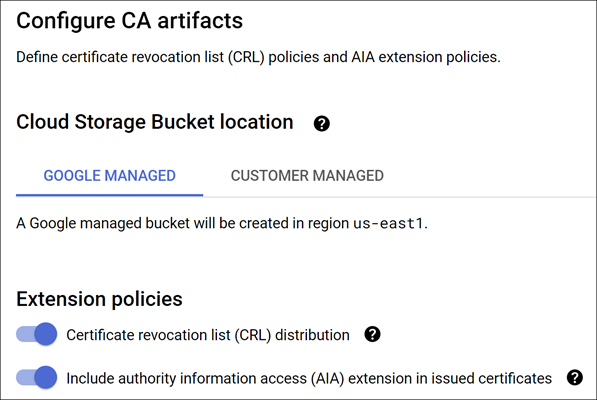
Step 4 - Certificate Artifacts
In this step, we'll configure what Google is calling the "CA Artifacts", which is the AIA and CRL. You can read more about how these work in my Microsoft CA post. For this setup, I'm going to let Google manage these and put them in a bucket that can be reached publicly.
Step 5 - Google Cloud Labels
We're nearing the end now, and we're asked about labels. Labels are key value pairs that you can assign to resources within the Google Cloud platform to help organize your resources. This isn't important for my lab, so I'll skip this step.
Step 6 - Review
And we're done! On this step we'll review our settings and then click the Create button.
What we've done and what's next
That's it, you're done! Next up, we'll create the Subordinate (or "Issuing") Certificate Authority. You can choose to do this with Google (post coming soon), or you could now switch back to Standing Up a Microsoft Certificate Authority - Part 2 and use a Microsoft CA for this.
No comments