Standing Up a Microsoft Certificate Authority - Part 6
This post is one in a series about setting up a Microsoft Certificate Authority. It's broken down into the following parts.
- Part 1 - Standing up your Root CA
- Part 2 - Standing up your Subordinate/Issuing CA
- Part 3 - Catch up on what we've done and how it works
- Part 4 - Trusting your Root CA across the domain
- Part 5 - Setting up Certificate Templates
- Part 6 - Using Computer, Web Server, and Code Signing Certificates (You Are Here)
- Part 7 - Using the Certificate Enrollment Web Interface
- Part 8 - Maintenance and your day to day work
- Part 9 - So you want to learn more?
This is an introduction to CAs only, and I’ll admit that all of my knowledge is from working with consultants to stand environments up and from reading Microsoft’s documentation. Make sure you do your own research to properly secure your CA and stand it up in a way that works best for your environment. A personal shout out again to my technical editor for this series, Anthony Fontanez.
Finally – the moment you’ve been waiting for! Issuing Certificates! We’re going to cover three enrollments for our three different certificate templates created in Part 5.
Configuring Workstation Certificate Autoenrollment
First, will be autoenrollment. Recall in the previous post that we enabled Autoenrollment on the Workstation Authentication certificate. To require systems to start requesting and installing these certificates, we’ll implement the appropriate Group Policy.
Like part 4, we’re going to create a brand new GPO for the purpose of autoenrollment, but in yours you may decide it makes more sense to add the certificate to an existing policy. Doesn’t make a difference so long as the policy applies to the clients that will need to enroll.
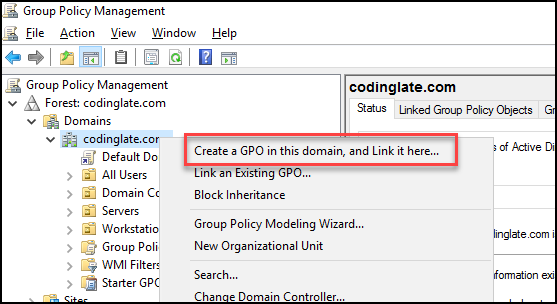
We’ll start by opening the Group Policy Management Console from any client on the network with access to it. We’re then going to right click on the domain or OU that we need the policy to apply to, and select “Create a GPO in this domain, and Link it here”. For my lab, I’m going to create this GPO right at the root of the domain, as pictured.
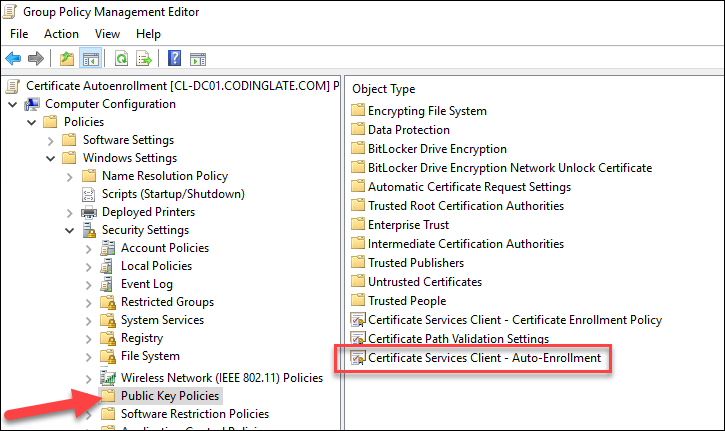
I’ll give mine the name “Certificate Autoenrollment” and click OK. I’ll then right click on the GPO and select to Edit it. You’ll find the policy you want to modify under Computer Configuration -> Windows Settings -> Security Settings -> Public Key Policies. The setting we’ll be updating is the Certificate Services Client – Auto-Enrollment.
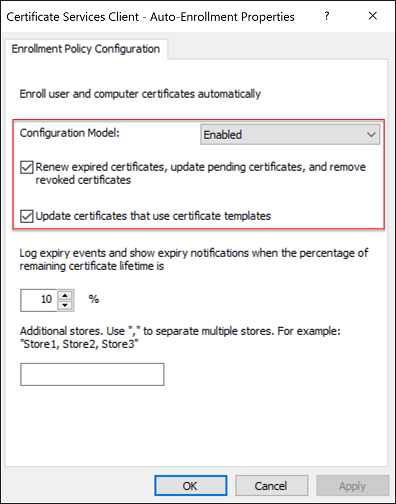
Edit that setting and enable the policy. You’ll want to enable the two options below the checkmark as well to update the local certificates automatically when necessary.
On a client system (In my lab, I’ll use Windows 10 system “Rose”), I’ll run a GPUPDATE from a normal command prompt. When it completes, I’ll validate that the certificate has been as follows:
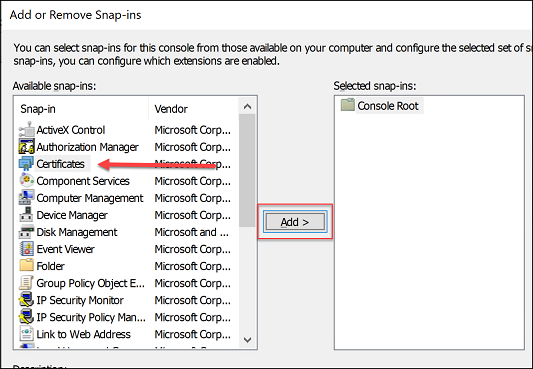
- Launch MMC.EXE as Administrator
- Select File -> Add/Remove Snap-ins, select the Certificates and then click Add
- When prompted, select Computer Account and click Next
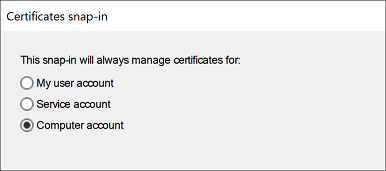
- Leave the computer as Local Computer and select Finish, followed by OK.
- Once the snap-in loads, expand the Certificates folder, followed by Personal, and then Certificates again. If everything was configured correctly, you should now have a certificate installed for the computer as shown.
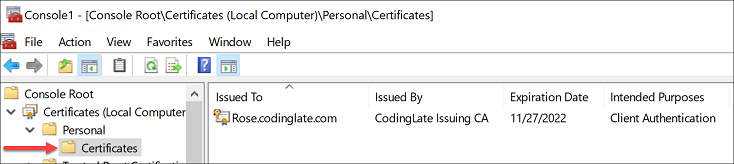
You can double click on the certificate and view the details in the same way you did in Part 3 of this series.
Configuring IIS Certificate Requests
Next, we’re going to configure a webserver on your domain running IIS to use a new certificate for HTTPS to secure traffic. In our lab, we have a server “srv01.codinglate.com” (which in a previous post we granted enroll access to for Web Server certificates).
To begin, we’ll open the Computer Accounts certificate snap-in just like we did in the previous section.
Launch MMC.EXE as Administrator
Select File -> Add/Remove Snap-ins, select the Certificates and then click Add
- When prompted, select Computer Account and click Next
- Leave the computer as Local Computer and select Finish, followed by OK.
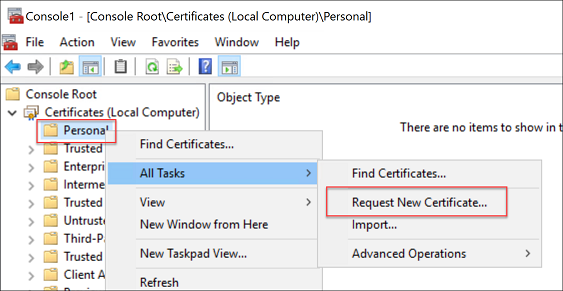
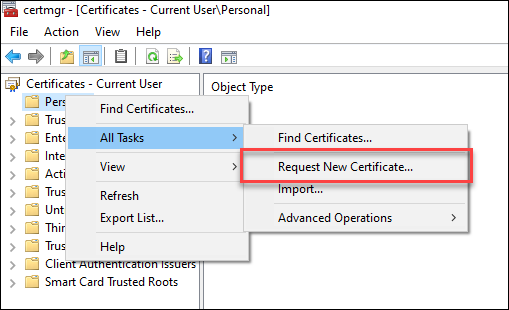
Next, we’re going to request a new certificate by right clicking on the Personal folder and selecting All Tasks and then Request New Certificate.
Select Next on the first two pages of the wizard until you come to the certificate selection page.
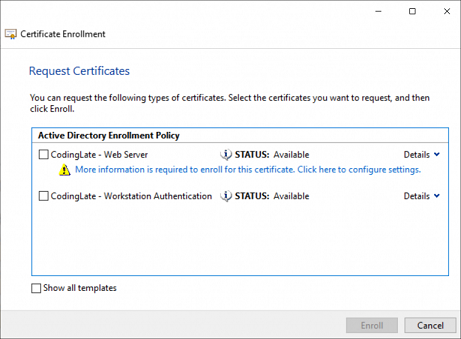
Click on the blue “More information is required” link to open a details panel for this request.
At a minimum, you’ll need to supply the common name and the DNS alternative name in the request for most modern browsers to accept the certificate. If your web server has a DNS alias in front of it (e.g. “mysite.codinatelate.com” points to your webserver), you’ll need to use that name. If there are multiple aliases that all point to the same webserver, you can include them all in as alternative names.
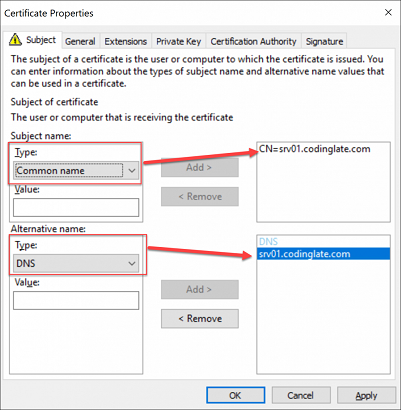
Once complete, click the OK button. Back in the enrollment wizard, ensure you have the template checked, and click the enroll button.
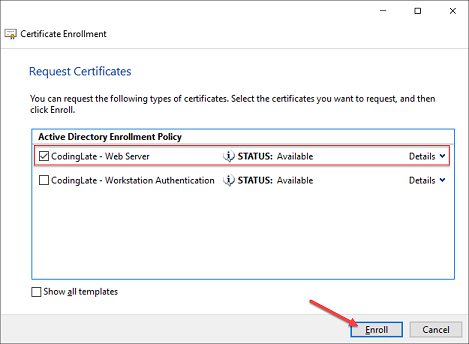
If all goes well, you should get a completion message, you can click Finish.

You’ll now have a new Web Server certificate in the personal store on your server. Next, we need to tell IIS to use this certificate when your users connect to this server over HTTPS.
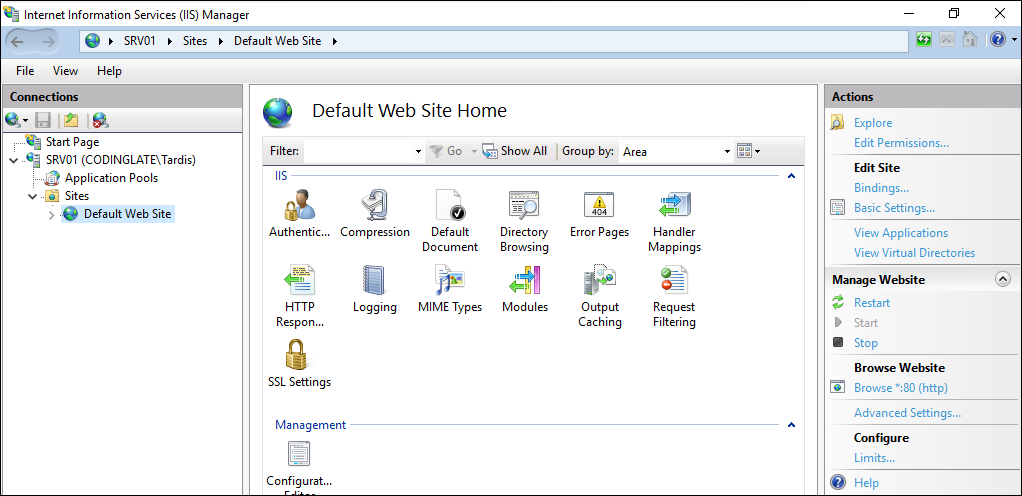
Start by launching the IIS Manager from your Start Menu. Expand the server name, followed by sites, and select the Default Web Site. Your console should look similar to what is shown in the image below.
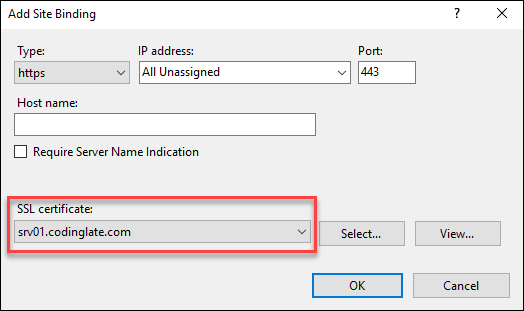
Click on the BINDINGS link in the right pane (under Edit Site) and click the Add button. Change the type to HTTPS.
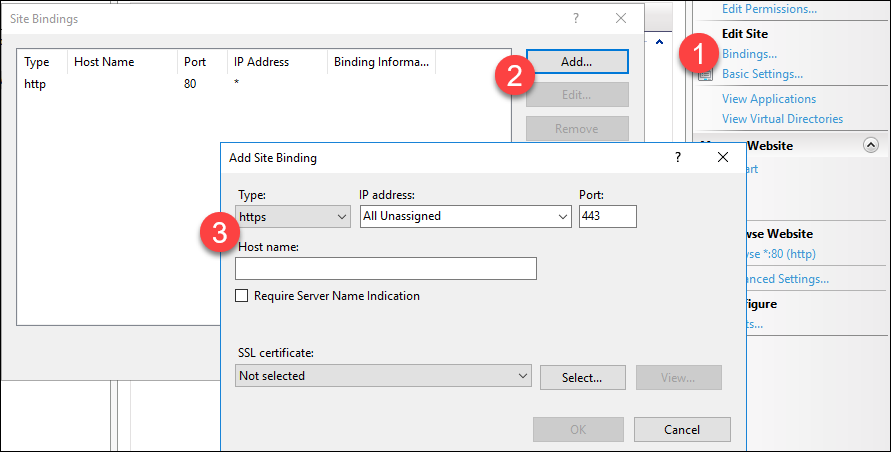
Drop down the SSL Certificate combobox and select the certificate we just generated. Click OK followed by Close.
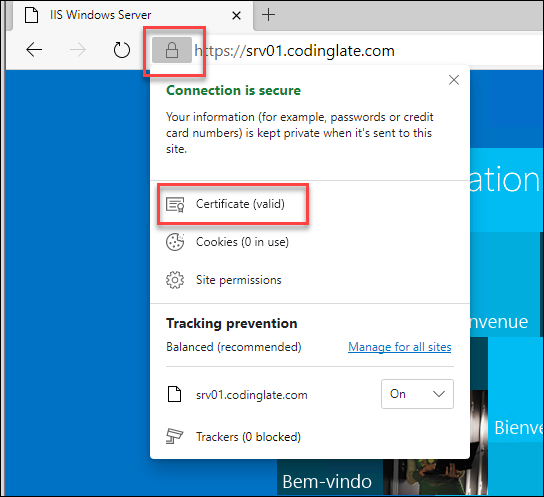
From a client system I’ll navigate to https://srv01.codinglate.com/ and see that my connection is secure and there are no SSL errors.
Generating a Certificate for Code Signing
For our last example, we’re going to request a Code Signing certificate and use it to sign a PowerShell script. Recall in the last post in this series we granted the user Rose access to enroll for a code signing certificate. To request that certificate, we’ll now follow these steps.
Login to a workstation as user Rose and open CERTMGR.MSC (not elevated, we need this to run as Rose). Like with our Web Server certificate, right click on Personal, select All Tasks, and then Request New Certificate
Select Next on the first two pages of the wizard until you come to the certificate selection page.
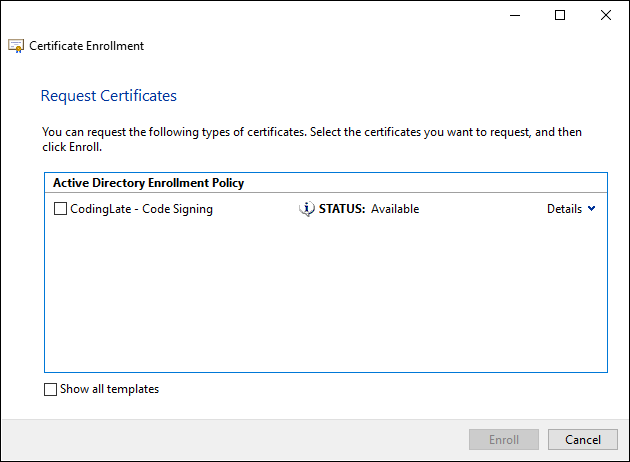
Put a check in the Code Signing certificate template and select Enroll. You should now have a Code Signing certificate issued to Rose.
To use this certificate to sign a script, we’ll use the Set-AuthenticodeSignature PowerShell command. To demonstrate this command, here is a block of PowerShell code that creates a file and then uses the code signing certificate to sign the file
 1# Create new PS1
 2'Write-Host "I will be a signed script"' | Out-File HelloWorld.ps1
 3
 4# Get the first code signing certificate from our personal store
 5$cert = (Get-ChildItem Cert:\CurrentUser\My -CodeSigningCert)[0]
 6
 7# Sign Our File
 8Set-AuthenticodeSignature .\HelloWorld.ps1 $cert
 9
10# You're done! But let's test it out.
11
12# Set an execution policy to require all scripts to be signed
13
14Set-ExecutionPolicy -ExecutionPolicy AllSigned -Scope CurrentUser -Force
15
16# Run our script
17
18.\HelloWorld.ps1
You’ll notice that when you execute the script, you’re prompted to trust the certificate. This is because the certificate for “Rose” isn’t in Trusted Publishers by default. Windows will add it there for you when you select “Always run”, or you can export the Rose certificate and deploy it to Trusted Publishers in the same way you deployed a certificate in Part 4 of this blog series.
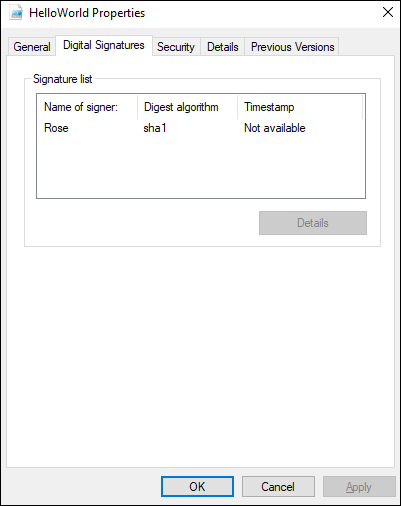
You can also validate that you script is signed by looking at the properties of the file as shown:
If you look at the contents of the file, you’ll also notice a signature mark at the bottom of it. If you modify the file in any way, that digital signature becomes invalid and the file will have to be resigned. This makes sense, of course, since you wouldn’t want someone to take code that you’ve signed and be able to modify it – the signature not only says it’s written by someone trusted, but also that it hasn’t been modified since it’s been signed.
The signed file is only trusted for as long as your certificate is. If you need the script to outlive the expiration date on your code signing certificate, use the TimestampServer parameter when calling Set-AuthenticodeSignature and find a publicly available timestamp server for code signing.
You can read more about script signing here, and the Set-AuthenticodeSignature command here.
Next: Part 7 - Using the Certificate Enrollment Web Interface
No comments